I would like to take a break from writing about all this fun Drupal configuration and CSS coding and stuff, and give a few minutes to say how awesome Amazon Web Services is. As I have mentioned, all of this fun and excitement is hosted on AWS. Back when I started playing with all this stuff (and dinosaurs roamed the Earth), the best you could get for $25 a month was a static web site maybe 500 MBs for storage, and the .COM address would cost you another $99 a year. But with AWS, so far my costs have been ~ 50 cents a month, and no higher that $19, because I registered a .ninja (ninja for crying out loud) domain.
Now keep in mind that I have signed up for that "free year" deal, so I have all these cool things to play with, but what happens in a year? Well, according to the Amazon Cost Calculator, if I keep everything where it is now, after a year I will see costs sky-rocket to ~$25 a month. Now this is a dedicated server with a static IP, gigs and gigs of storage, a domain name, and point and click load balancing if and when I need it (and at this point I don't think I will need it). If I expand to include an additional server and a NoSQL database (DynamoDB), then my costs go to a whopping $38. Of course, things will change dramatically if all this work I am doing suddenly becomes popular, and we all know that the internet is starving for personal web sites and blog posts about technology, then either these estimates will be incredibility low due to scaling or people will get a lot of server time out errors.

This man knew a thing or two about saving pennies
"How can I do this myself" you may say, and that is easy. I would recommend starting with a static web site hosted on Simple Storage Service, or S3. S3 has all you need to run a static web site, and it is very close to free. Pricing for standard storage is around 3 cents per Gig, and 5 cents for every 1000 requests. So unless you are running an enterprise file server you could reasonably keep the costs for your site around 20 cents a month (!!!!). Of course, there are costs with Route 53, Amazon's domain name service, which run at around 50 cents for the domain record 40 cents per 1 million requests. This would increase your costs to $1.10 a month. Of course there is the domain registration, which run from around $9.00 and up (ninja was $18), which you will encounter yearly.
"Enough" you may say, "Get to the fun stuff. How do I set this all up?" Glad you asked. Start at the AWS home page and set up a new account. If you already have a Amazon.com account, you can use that. Like any good drug pusher, AWS offers a lot of servers for free (or nearly free) for the first year, but you will still need a credit card (your Amazon.com payment info will not transfer). Once you have signed up, go to Route 53 in the AWS console (click on the little cube thing in the upper left hand corner of your browser), under Networking. Then select Domains >> Registered Domains from the left hand navigation, and then select the Register Domain button at the top of the page.
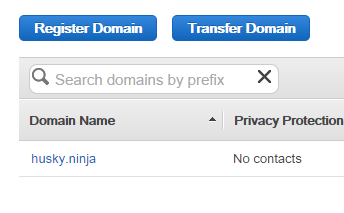
The button to the left starts something that will suck up all your free time
This next part I usually find kind of fun: Choosing a domain name. Once you've fond a good domain name (which can be hard since a lot of names have been taken), select Add To Cart on the left hand side, and then select Continue at the bottom of the page. Next, fill out your contact details, select Continue, and then finally Complete Purchase. You will receive an email to confirm you are who you say you are, so follow the instructions contained in the email and then you're done. Well, at least this step.
Completing the registration process can take up to a couple of hours, so you can get a snack or take a shower or whatever you do to kill the time while you wait. Once the domain is registered it is time to configure your buckets. Go to the AWS Console again, and select S3 under Storage & Content Delivery, and select the Create Bucket button at the top of the page.
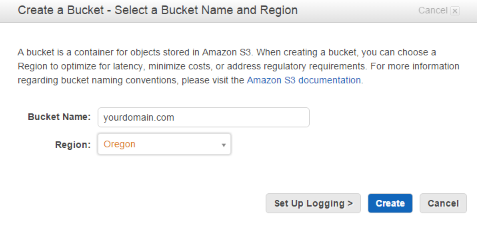
Remember to enter your domain name, and not yourdomainname.com
For the Bucket name you should enter the domain name you just registered without the "www" root, and then again with the "www" root (for example: "husky.ninja" and "www.husky.ninja"). Don't forget to set the region. In the first bucket, highlight the bucket name, and select the Properties button at the top of the page. In the right hand console, select the Permissions roll-up and then select "Edit bucket policy". From the Bucket Policy Editor pop-up, enter the following, while substituting the highlighted section with your domain name:
{
  "Version":"2012-10-17",
  "Statement":[{
	"Sid":"AddPerm",
        "Effect":"Allow",
	  "Principal": "*",
      "Action":["s3:GetObject"],
      "Resource":["arn:aws:s3:::thisisyourwebsite.com/*"
      ]
    }
  ]
}
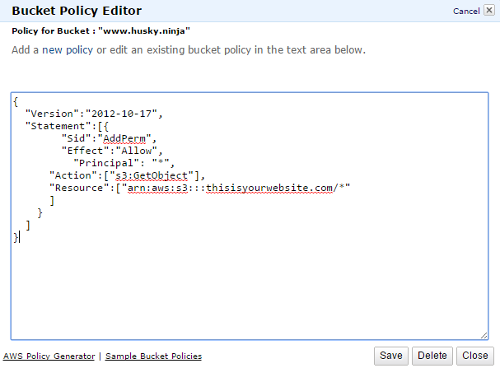
Just like this, but use the correct domain name
Now select Save. Phew. We're getting there. Now, select Static Web Hosting in the right hand console, and then select the radio button "Enable website hosting". You now have a static web site. Well, almost. You still need to configure the other bucket.
"Now hold on," You might say. "You said this would be quick and easy." Well, no I didn't, but it could be a lot harder. And a lot more expensive. Hang in there, we're getting close. Select the other bucket (the one with the www), and select the Properties button. In the right hand console, select the Static Website Hosting roll-up, select the "Redirect all requests to another host name" radio button, and then finally enter the other bucket name in the "Redirect all requests to" text-box.
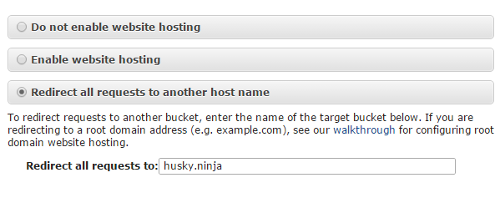
The redirect for the "www" bucket - are you confused yet?
"Is that it?" you might say, "Do I have my web site now?" Well, no. You now need to configure Route 53 to point to your main bucket.
Now before you get all "pitchfork and torches" on me, we're almost done. From Route 53 (AWS Console >> Networking >> Route 53), select Hosted Zones from the left hand navigation, then select your hosted zone you created earlier on. Now, select the Create Hosted Zone button, then select the Create Record Set button. In the right hand console under Alias, set the radio button to Yes and then select Alias Target, which will auto-populate with all your choices, which will be limited to just the S3 website endpoints at this stage. Select the endpoint without the "www" in it. Then select the Create button at the bottom. Almost there. We now need to create another record for your "www" site redirect thing.
Again, select the Create Record Set button, and then in the right hand console enter the "www." in the Name text-field. In the right hand console under Alias, set the radio button to Yes and then select Alias Target, which will auto-populate with all your choices, which will still be limited to just the S3 website endpoints. Select the endpoint with the "www" in it. Finally, select the Create Record Set button.
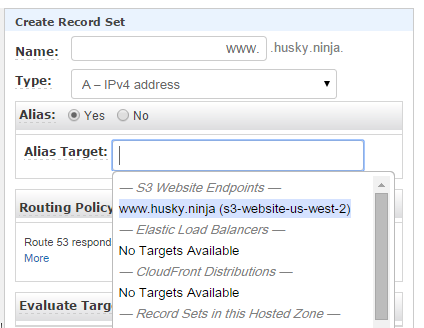
It is as easy as selecting things from a drop-down
"Are we done?" you may ask. And, yes we are.
"Or I could just head over to GoDadday and simply enter a credit card number." you might say. But what kind of fun is that? Besides, there are dozens of other cool things to learn, like using S3 to run a blog using Jekyll, or mount S3 as attached network storage, or use S3 as a data backup location. And that is just using S3.
Like I said, AWS is awesome.
Postscript: If I managed to totally confuse you, I recommend checking out this blog post at Site Leaf. Its got a bunch of cool animated gifs to follow along to.